
Setup Oculus Quest 2 and Oculus Link to run in Unity Play Mode
The best tool in any developer’s belt when creating something new is having the ability to run and test changes as they go. Initially, I was only able to test my games by running Build and Run in Unity, but that got a bit tedious, and wanted a better way to check my work as I went along. It took going through a number of tutorials scattered around the internet to finally get my Oculus Quest 2 working in Unity Play Mode. This is that story…
Requirements
- Unity (We are using 2020.3.5f)
- Oculus Link Software
- Oculus Link Cable
Oculus Link
The first thing you will want to do is install the Oculus Link application and configure your device.
- Open the Oculus app on your PC.
- Turn on your Quest.
- Plug your USB 3 cable into a USB 3.0 port on your PC, then plug the other end into your headset.
- If you are prompted with ‘Allow access to data’, select Deny.
- Next, you’ll be prompted to Enable Oculus Link (beta), select Enable to begin remote rendering via Oculus Link.
Common Issues
- Make sure cable is secure on both computer and headset
- Make sure that the Oculus Quest headset is powered on
Unity
Create Project
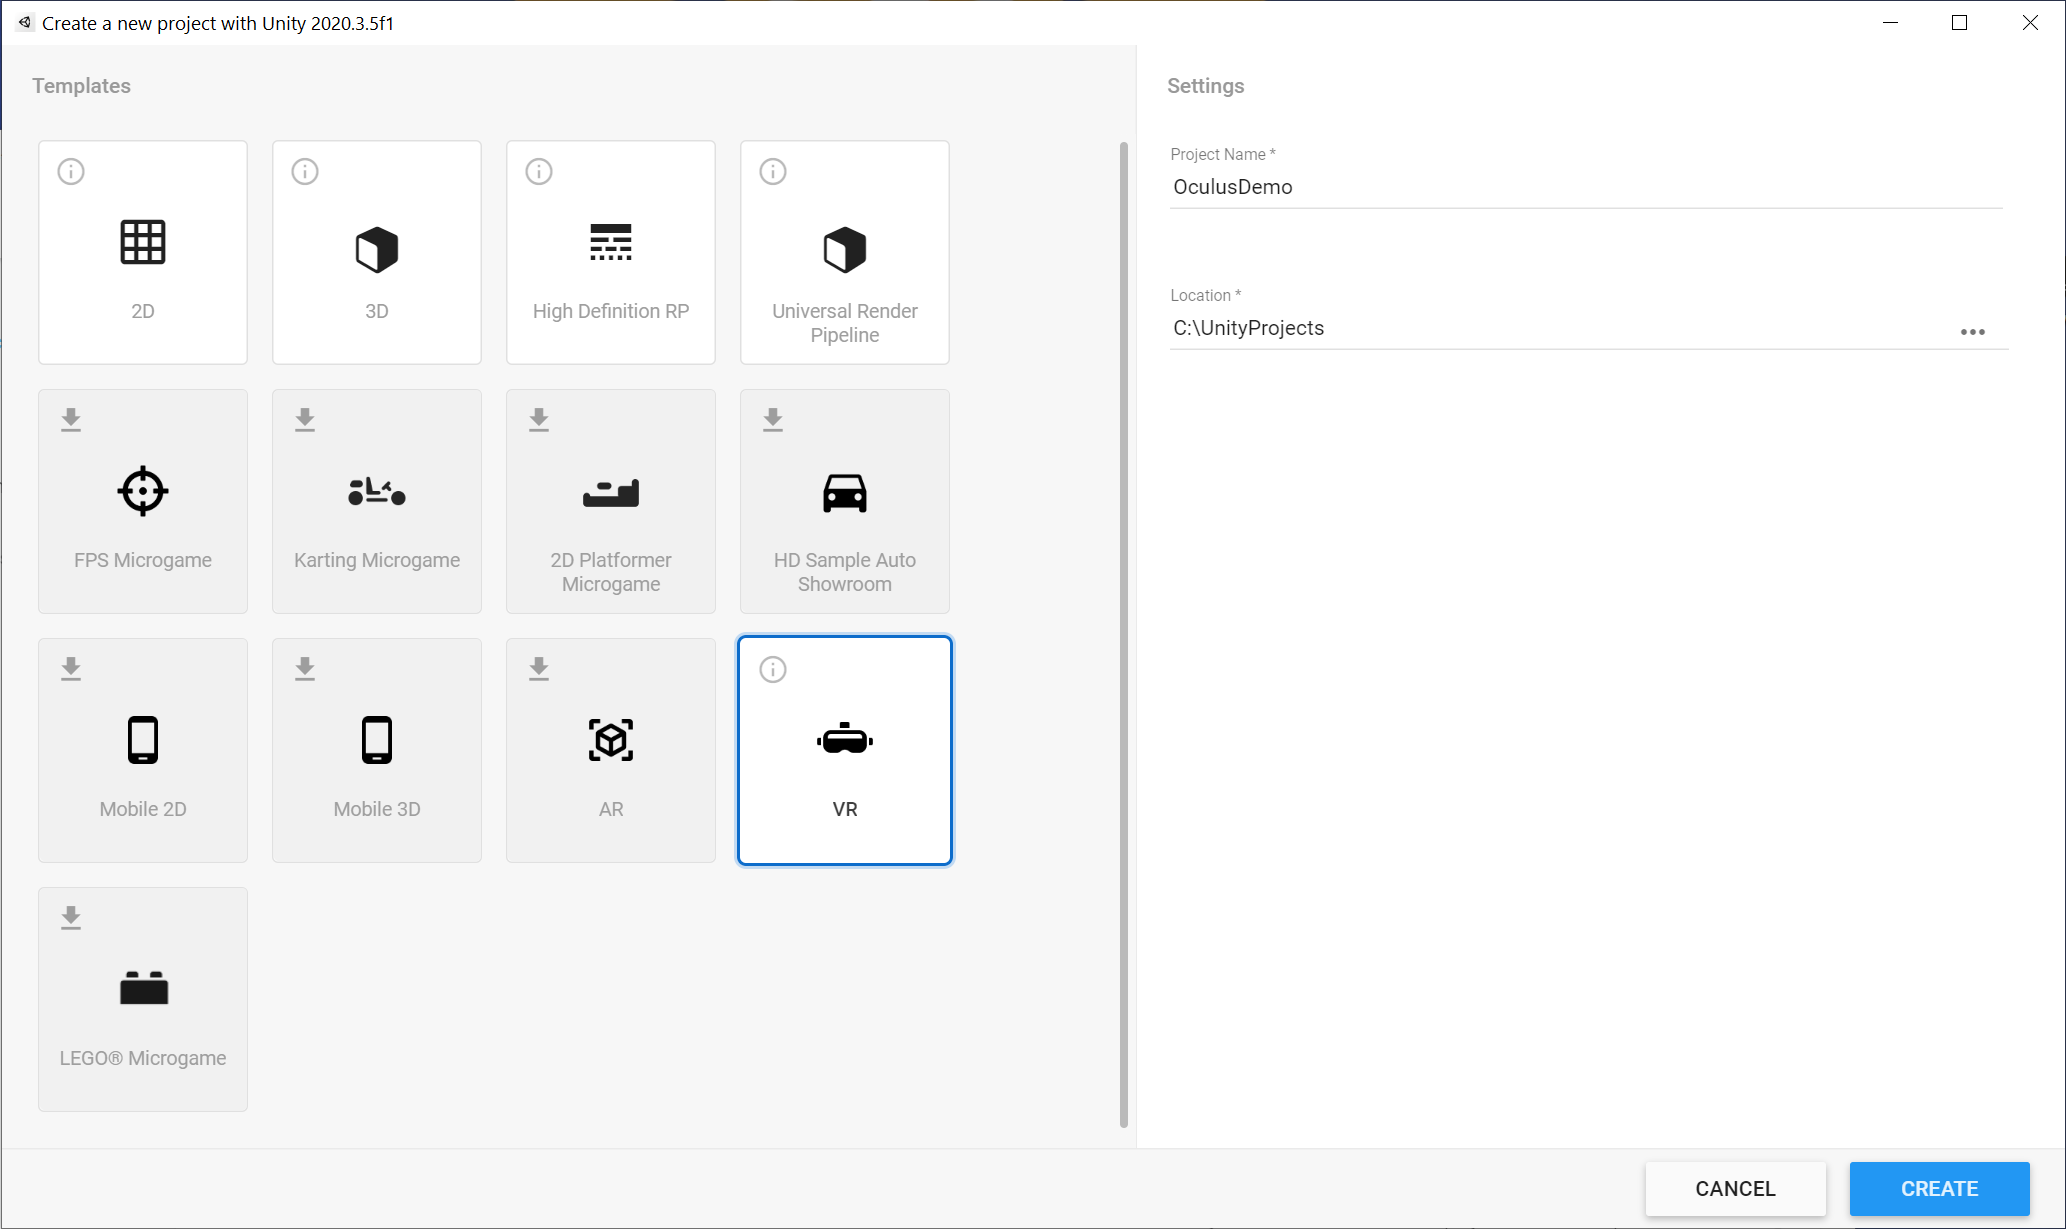
When creating a new VR project, it is best to select the VR template from the Create a new Porject window. This will install
the default packages we will need to interact with our VR environment. If you do not, it is ok since we will be going
over what packages to install in the next section.
Provide and Name and Location for your project and click Create.
Install necessary packages
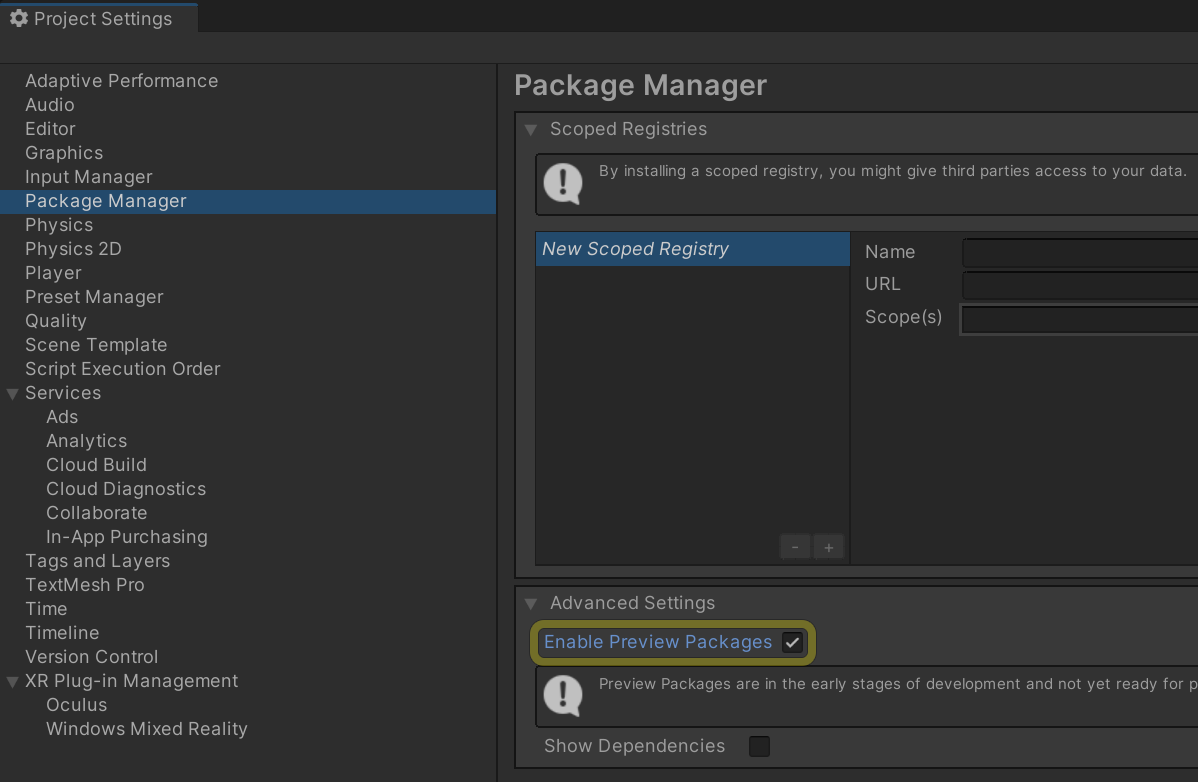
One of the packages we will be using is currently in Preview, so it will not show up in the Package Manager on its own. In order to enable preview packages, we need to enable these types of packages.
Under Edit -> Project Settings -> Package Manager we will find the option ‘Enable Preview Package’ which will allow us to see these additional options.
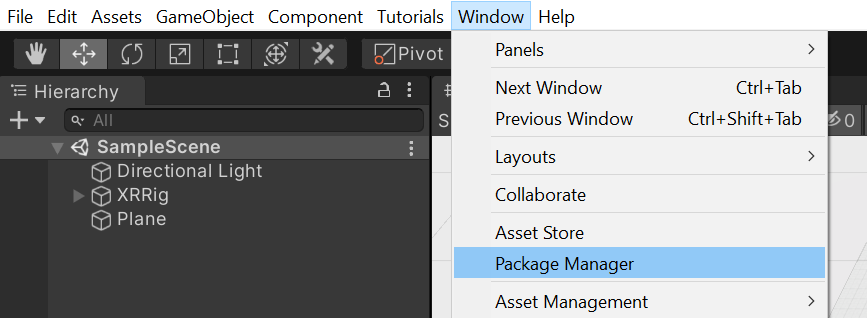
Next need to set up the XR Integration. If you have used the VR Package when creating your project you should already have the necessary packages installed, but it might be beneficial to check if for anything to see if there are any updated available.
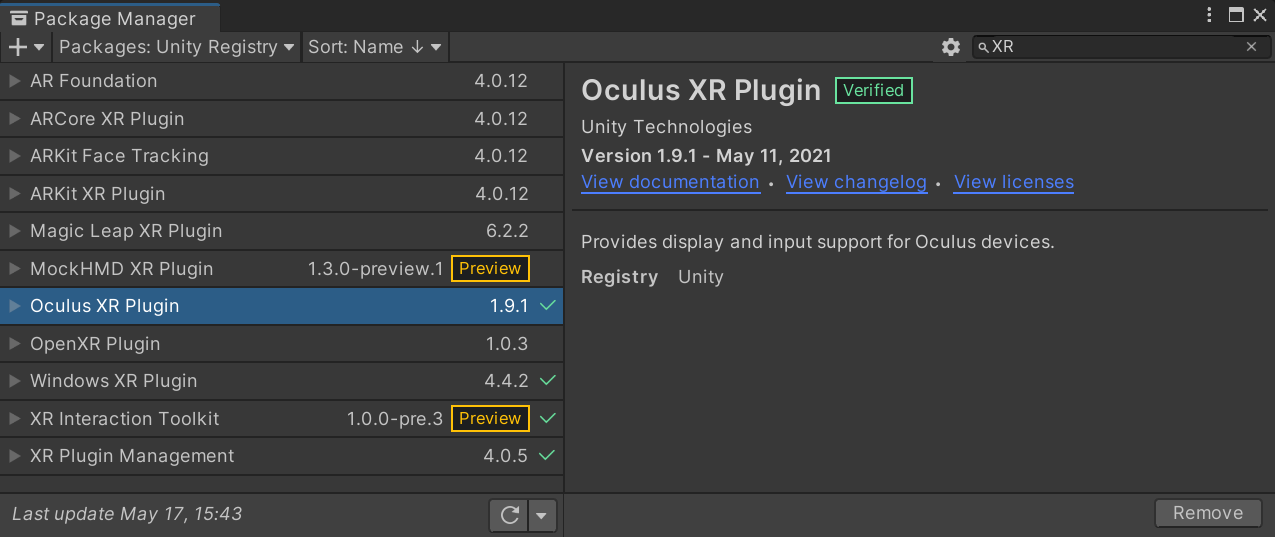
The main package that is required is the Oculus XR Plugin while the XR Integration Toolkit is purely optional
it does provide some additional functionality to make development easier. Select each of these options and click ‘Install’
in the lower right-hand corner.
Setup Unity Oculus Integration
We need to now make sure that the Unity project is set up to use the Oculus for the environment.
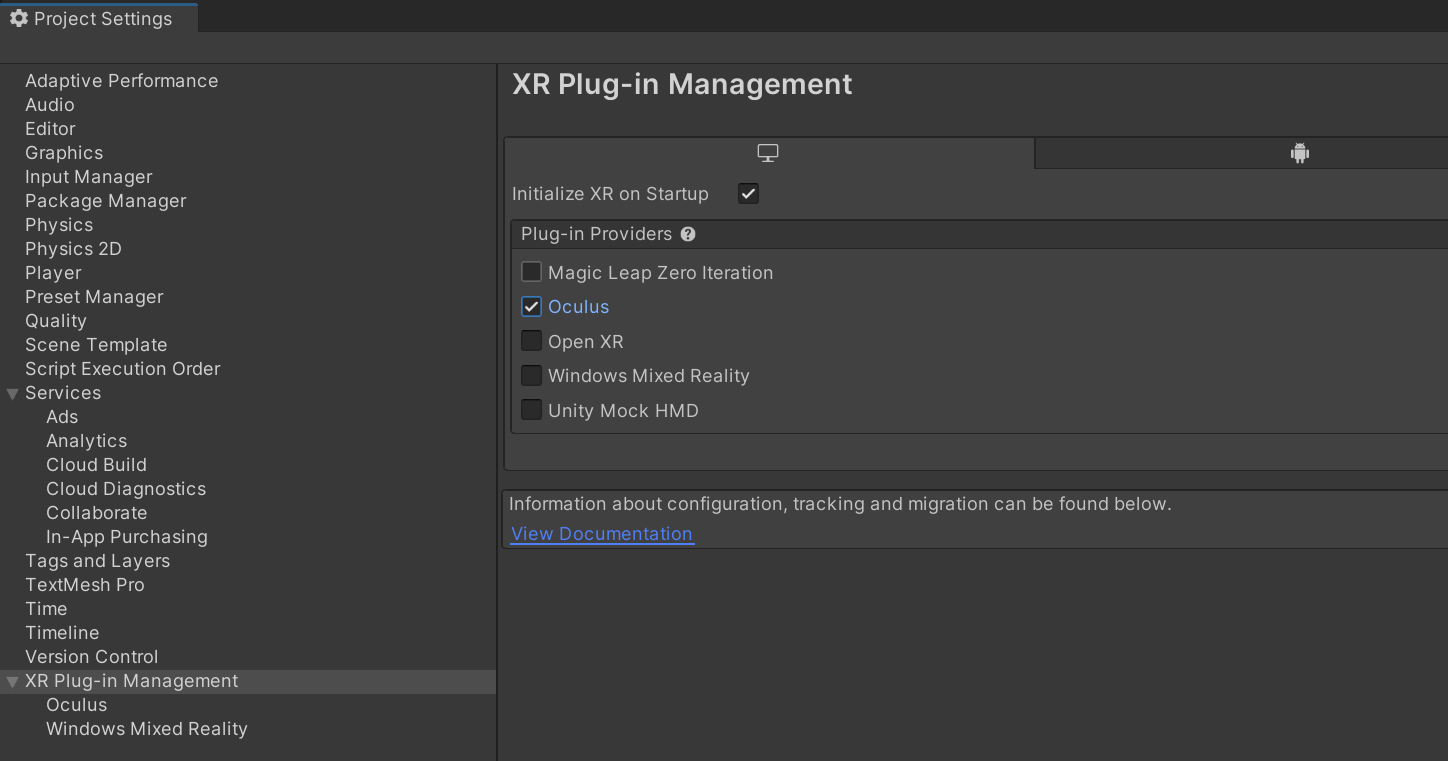
Back under ‘Edit -> Project Settings -> XR Plug-in Management’ we want to make sure that ‘Initialize XR on Startup’ is checked and ‘Oculus’ is checked under ‘Plug-in Providers’. Be sure that you have enabled Oculus for whatever build environment you are working with. As displayed, we are current set up for PC & Standalone, but if your application is set for Android, you would want to go to the Android Tab and make sure Oculus is selected as well.
Run Scene
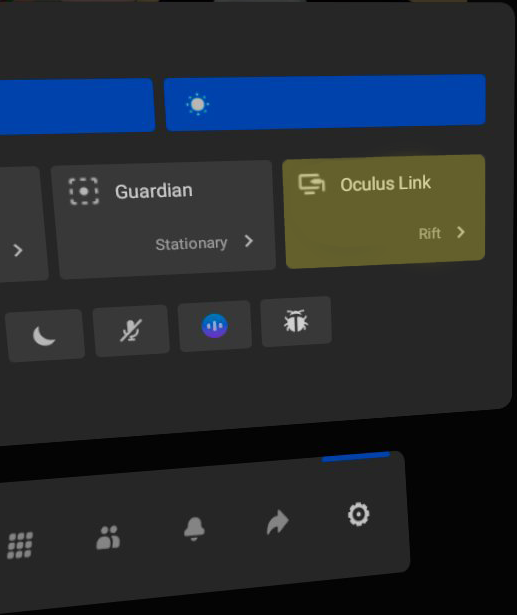
Once everything is set up, you will need to put on your headset and open your settings menu. On this screen you should be able to see an option labeled ‘Oculus Link’ (it may say also say ‘Rift’ underneath but that is ok).
At this point, you will be presented with a new interface and menu bar. You can now enter Unity Play Mode and be able to explore your scene in VR. You will also want to make sure you’ve allowed any device connections between your headset and computer by responding to any prompts on the Oculus Quest 2.